
Showing posts with label Budget. Show all posts
Showing posts with label Budget. Show all posts
Renting Wedding Supplies on Craigslist
Genius! Seriously! I was just perusing the pages of Craigslist for a buffet (like an actual buffet for our dining room) when I came across a listing for RENTING candy buffet supplies. GENIUS! Apothecary jars can be insanely expensive. And, while I have utilized some of my (ill-fated candy buffet) apothecary jars in my home decor (i.e., on my book shelf, in my front hall, etc.), chances are, you'll never really use them again. So, my budget-savvy friends, Craigslist away...Craigslist away.


mod milk glass?
Nathan and I trekked out to Ikea yesterday (Nathan's personal hell) to brainstorm possible media storage solutions for our new place, and of course I spent an additional hour exploring all of the inexpensive decor possibilities... You really can't take me anywhere these days. :)
During my exploration, I came across these adorable modern white vases that reminded me of milk glass! If you're a mod girl having a mod wedding, wouldn't it be cute to incorporate these into your centerpieces!? Filled with a single bud or left empty displayed at varying heights, I think these vases would make a perfect addition to a sleek wedding design!


During my exploration, I came across these adorable modern white vases that reminded me of milk glass! If you're a mod girl having a mod wedding, wouldn't it be cute to incorporate these into your centerpieces!? Filled with a single bud or left empty displayed at varying heights, I think these vases would make a perfect addition to a sleek wedding design!


an eyelet and doily inspired wedding
These days, after 3 months of a particularly harsh and freezing winter, I find myself daydreaming about summertime fun in the sun! Can you blame me?!
So today I’d like to bring you my summer wedding daydream! Oh, if I had to do it all over again, I might have chosen a mid-June, outdoor, eyelet & doily inspired wedding! Talk about casual elegance! And, the number of ways you can showcase eyelet and doily details are almost limitless!
You or your flower girl could wear a fabulous (yet understated) eyelet dress. Your cake could feature eyelet- or lace-punched fondant. You could wrap your cylinder candle vases in paper doilies or eyelet fabric. You could purchase Martha's premade eyelet wedding invitations or decorations (fantastic prices, may I add)! You could use eyelet or lace inspired embossers or hole punchers to embellish your wedding paper, or adhere paper-lace doilies to a variety of your wedding paper like this fabulous DIY bride! You are limited only by your imagination!!


 photo credits: Creative Odds 'n Ends, HWTM, Martha's Eyelet Collection via Redbook, Lee and Hamilton Blog, Lee and Hamilton Blog, Martha's Eyelet Collection via Redbook
So today I’d like to bring you my summer wedding daydream! Oh, if I had to do it all over again, I might have chosen a mid-June, outdoor, eyelet & doily inspired wedding! Talk about casual elegance! And, the number of ways you can showcase eyelet and doily details are almost limitless!
You or your flower girl could wear a fabulous (yet understated) eyelet dress. Your cake could feature eyelet- or lace-punched fondant. You could wrap your cylinder candle vases in paper doilies or eyelet fabric. You could purchase Martha's premade eyelet wedding invitations or decorations (fantastic prices, may I add)! You could use eyelet or lace inspired embossers or hole punchers to embellish your wedding paper, or adhere paper-lace doilies to a variety of your wedding paper like this fabulous DIY bride! You are limited only by your imagination!!


 photo credits: Creative Odds 'n Ends, HWTM, Martha's Eyelet Collection via Redbook, Lee and Hamilton Blog, Lee and Hamilton Blog, Martha's Eyelet Collection via Redbook
Purple Bridesmaid Dress

Argh! Of course, oooooof course this would happen. JCrew has an absolutely gorgeous eggplanty-raisiny purple bridesmaid dress that would have been perfect for my bridesmaids! That's what I get for being slightly ahead of the color curve!
Purple wedding girls: capitalize on JCrew's "spiced wine" bridesmaid dresses! They are fabulous!
photo credit: JCrew
Purple wedding girls: capitalize on JCrew's "spiced wine" bridesmaid dresses! They are fabulous!
photo credit: JCrew
Vendor Review V: Fabulous DOC
 Honey Bee Weddings: A+
Wedding designers, wedding planners, wedding coordinators, day-of-coordinators (whatever they classify themselves as) are truly amazing phenomena. Nothing, let me say it again, nooooooooothing could drive me to work with planning-crazed brides, unorganized vendors, or micromanaging mothers. But these professionals brave the chaos and revel in the challenge to bring order. They are like firefighters running toward a burning building while the rest of us are running for our lives. And, Misse from Honey Bee Weddings, was exactly that firefighter for me...
I had originally hoped to DIY a DOC by enlisting “a friend of a friend” who wanted to break in to the business. However, wedding coordination proved to be too hard a task for her, as she silently bowed out a few months in. So, I promptly got down to the business of sifting through dozens of overpriced Chicagoland DOCs – an exhausting and unsettling process, indeed. But, thankfully, it didn’t take me too long to find Misse. I hired her on the spot as my Day of Coordinator…but I quickly realized that the phrase “day of” didn’t begin to describe her services.
At our first meeting, Misse offered budget-friendly vendor references (fruitwood chivari chairs with any color cushion for $6.50 per chair, what?!). She later offered invaluable wedding paper assistance (the amount of proof-reading and correcting she did was almost criminal). And during the week of my wedding, she navigated impossible vendor communication (impossible because I was busy entertaining family and being the bride)!
The day of the wedding, Misse did EVERYTHING - everything from picking up the wedding cupcakes, (because Sweet Mandy B's has a no-delivery policy), to keeping everyone/everything on time, to DIY project set-up (menus, place cards, advice jars, etc.), to post-reception tear-down. She even put out a small “fire” when 2 guests were unhappy with their table, and decided they were going to pick up their place settings and move – literally. She was poised and professional and found a way to make everyone happy! And, I don't know how, but she actually found time to step in to the photobooth, which left us with an AWESOME keepsake, (photo to the left)!
From “phase one planning” to the “day of coordinating”, Misse proved to be an invaluable resource on so many levels! If I had to do it all over again, I would only do one thing differently: I would have hired her as soon as I got engaged! Seriously, ladies: contact her!
related posts: our budget-friendly wedding V: farewell brunch, our budget-friendly wedding IV: reception, our budget-friendly wedding III: DIY wedding paper, Vendor Review IV: Photobooth, Vendor Review III: Wedding & Reception Flowers, our budget-friendly wedding II: ceremony, Vendor Review II: Hair and Make up, our budget-friendly wedding I: Attire, The photos are in!!!, Vendor Review I: Reception Music
our budget-friendly wedding V: farewell brunch
I don't know why, but I honestly thought that I had to give our guests a delicious farewell brunch before sending them home to their respective cities. I thought it was the only way to say "thank you" for traveling all the way to Chicago, spending hundreds, maybe thousands, on travel and hotel costs, and getting Nathan and I a wonderful gift. But then I realized how crazy it was to spend nearly 10% of our budget on a day-after brunch!
So, we decided to organize a Farewell Open House - wait for it - in our hotel suite. (BTW, we totally lucked out when The W accidentally gave my aunt (my namesake) our bridal suite, because our upgraded suite was A LOT bigger. Score!)
We decided to have Corner Bakery "cater" the "event" (which simply meant ordering $125 worth of muffins, pastries, and other morning goodies, tons of fresh fruit, and lots of hot coffee). We displayed our super awesome photobooth guestbook so people could page through the hilarious photos and relive the evening. People came and went at their own pace - many slept in and came late, while others came early and left soon after to catch a flight. It was casual and fun - exactly like Nathan and I, if I do say so myself! All in all, it was the perfect way to say goodbye to our family and friends.
So, we decided to organize a Farewell Open House - wait for it - in our hotel suite. (BTW, we totally lucked out when The W accidentally gave my aunt (my namesake) our bridal suite, because our upgraded suite was A LOT bigger. Score!)
We decided to have Corner Bakery "cater" the "event" (which simply meant ordering $125 worth of muffins, pastries, and other morning goodies, tons of fresh fruit, and lots of hot coffee). We displayed our super awesome photobooth guestbook so people could page through the hilarious photos and relive the evening. People came and went at their own pace - many slept in and came late, while others came early and left soon after to catch a flight. It was casual and fun - exactly like Nathan and I, if I do say so myself! All in all, it was the perfect way to say goodbye to our family and friends.

 Photo credit: W Hotel City Center, photos of our Wow Suite
related posts: our budget-friendly wedding IV: reception, our budget-friendly wedding III: DIY wedding paper, Vendor Review IV: Photobooth, Vendor Review III: Wedding & Reception Flowers, our budget-friendly wedding II: ceremony, Vendor Review II: Hair and Make up, our budget-friendly wedding I: Attire, The photos are in!!!, Vendor Review I: Reception Music
our budget-friendly wedding IV: reception
When you cut through all of the fluff (the crafty wedding paper, the themed decor, the fancy china, the rented lounge furniture, whatever your wedding may have featured), all receptions are the same. From the local VFW to The Drake, the same laughs, the same tears and the same good times are had.
What I'm about to share, no amount of money can buy...they just happen...
 Shortly after, Nathan's brother (BM), my father, and my sister (MOH) gave the most touching speeches I'd ever heard. (I'm sure everyone says that about their wedding...) We laughed...


What I'm about to share, no amount of money can buy...they just happen...

Nathan and I decided to completely omit some of the not-so-timeless "reception ceremonies", such as the bouquet toss and garter ceremony (to each his own, right?), and we decided to vary some of the others. For instance, Nathan and I were introduced casually, sans bridal party, to Queen's "You're My Best Friend" ...It might sound corny, but as our DJ started playing the song, Nathan looked at me and said, "I'm so lucky to have married my best friend..." As we rounded the corner, we entered the room to a roar of claps and "wooows", but I'm not sure if the smile on my face is from the crowd's welcome or from Nathan's comment.
 Shortly after, Nathan's brother (BM), my father, and my sister (MOH) gave the most touching speeches I'd ever heard. (I'm sure everyone says that about their wedding...) We laughed...

...and cried. And, nearly all of our guests mentioned how touching the speeches were.
 Nathan and I danced our first dance as a married couple to Making Memories of Us. Nathan's not much of a dancer (I know, I'm the lone dancer in a family of wall-flowers...), so we decided we would invite everyone to join in after the first 60 or so. The bizarre thing was, he knew everyone was staring at us, but he didn't care. He just stared into my eyes and sang to me. It was the fastest and slowest 4 minutes of my life...


Later, I danced with my father to My Wish. Because he was terrified to have "all eyes on him", we decided to make it an "informal" father-daughter dance...covertly sneaking a private dance amidst the sea of other dancers. His plan worked, no one looked at him! He kept saying, "how am I doing; should we be moving around more; why is the photographer taking pictures of us, doesn't he know how funny I look right now?" It was hilarious! But then, he got really serious and said, "this would be a lot harder for me if Nathan weren't the best mad I'd ever met..." I lost it - completely broke down on his shoulder. Thank goodness this photo was taken just before. It's one of my favorite photos from the entire evening.
 And then we danced and danced...
 and danced (with some air guitar)...

 And then we danced and danced...
  and danced (with some air guitar)...
...and danced some more... (Name that tune: "a little bit softer now, a little bit softer now...")

 We wrapped up the evening with a photo shoot in the stacks... These are my FAVORITE photos from the entire evening, bar none. Even though it was relatively planned out, the photos seem to have captured our stolen moments.
related posts: our budget-friendly wedding III: DIY wedding paper, Vendor Review IV: Photobooth, Vendor Review III: Wedding & Reception Flowers, our budget-friendly wedding II: ceremony, Vendor Review II: Hair and Make up, our budget-friendly wedding I: Attire, The photos are in!!!, Vendor Review I: Reception Music

 We wrapped up the evening with a photo shoot in the stacks... These are my FAVORITE photos from the entire evening, bar none. Even though it was relatively planned out, the photos seem to have captured our stolen moments.
 related posts: our budget-friendly wedding III: DIY wedding paper, Vendor Review IV: Photobooth, Vendor Review III: Wedding & Reception Flowers, our budget-friendly wedding II: ceremony, Vendor Review II: Hair and Make up, our budget-friendly wedding I: Attire, The photos are in!!!, Vendor Review I: Reception Music
our budget-friendly wedding III: DIY wedding paper
Almost every piece of our wedding paper was DIY. I didn't mean for it to happen that way, but as I researched costs of programs and menus and calligraphy escort cards, I realized that we could break our budget on wedding paper alone.
About a month before the wedding, I decided to pitch the "candle escort card" idea because I became obsessed with these little books. Obsessed! Inside these beautiful little books, I used a "Story of Us" book theme, which was also used throughout the rest of our ceremony and reception paper. It was entitled, "Chapter II: In the Beginning" and featured our tear-jerking engagement story. (Our menus [not pictured] were entitled, "Chapter III: Eat, Drink and Be Married," of course!) Unfortunately, my photographer did NOT get a shot of the escort cards in all their displayed glory. But, oh well, at least I have something. (I love how you can see the library books in the background!)


 (Disclaimer: Please excuse the quality of the next photo. We haven't yet had our final photography meeting, and therefore, have not received the final color corrected images.)
Our advice jars were placed in each of the large seating nooks. Apparently this was the perfect place for them, because EVERY SINGLE PERSON at our wedding left us a little note of advice. I almost feel guilty to have these little tid-bits of marital capital, almost like we should have to figure it out on our own... But, I'll admit, it was so much fun reading the advice with Nathan... One listed the author's version of the top ten marriage myths, the first one of which said, "it is actually okay to go to bed angry, as long as you make up for it in the morning!" It's almost too perfect, isn't it?!)
 Last but not least are the programs. I can't believe I'm about to say this, but our photographers only got ONE shot of our programs, and it was only of the back cover. The back cover featured the chorus of "You're My Best Friend" (courtesy of i heart peonies inspiration), which is great and all, but I labored over the eight-page, all-inclusive, programs that featured a vellum pouch on the last page with a single tissue tucked inside...for their tears of joy. I'm so incredibly disappointed that I don't have a photo of them, because the hotel threw away the extra copies, leaving us (and anyone who was in the processional) with no keepsake. Bummer, indeed.

About a month before the wedding, I decided to pitch the "candle escort card" idea because I became obsessed with these little books. Obsessed! Inside these beautiful little books, I used a "Story of Us" book theme, which was also used throughout the rest of our ceremony and reception paper. It was entitled, "Chapter II: In the Beginning" and featured our tear-jerking engagement story. (Our menus [not pictured] were entitled, "Chapter III: Eat, Drink and Be Married," of course!) Unfortunately, my photographer did NOT get a shot of the escort cards in all their displayed glory. But, oh well, at least I have something. (I love how you can see the library books in the background!)

Next up are the Bride and Groom chair signs. This was a super quick project; seriously, it only took about 20 minutes, a printer, a xyron, and some ribbon. Of course, since our wedding, I've come across some really beautiful B&G signs, tied with thick, luscious ribbon, and now I totally regret not thinking that part out. But, oh well, live and learn...

Some of you may remember my original plans for our table numbers. Well, I searched and searched and couldn't find any "usable" digital images, so I forfeited that awesome idea, and went the super-easy route. This project was also extremely quick and cost effective. All that was needed were tent cards, a printer, and a xyron. Twenty minutes later, ALL of my signs were done - table numbers, bar menus, advice jar, everything. (There is an abandoned DIY project within these table numbers as well, but that's for a later post...stay tuned.)
(Disclaimer: Please excuse the quality of the next photo. We haven't yet had our final photography meeting, and therefore, have not received the final color corrected images.)Our advice jars were placed in each of the large seating nooks. Apparently this was the perfect place for them, because EVERY SINGLE PERSON at our wedding left us a little note of advice. I almost feel guilty to have these little tid-bits of marital capital, almost like we should have to figure it out on our own... But, I'll admit, it was so much fun reading the advice with Nathan... One listed the author's version of the top ten marriage myths, the first one of which said, "it is actually okay to go to bed angry, as long as you make up for it in the morning!" It's almost too perfect, isn't it?!)
I expanded on the typical "advice note card" idea by fashioning library-check-out-advice-note-cards (which were inspired by this post by Creature Comforts). I made ours slightly larger than hers and customized it to read, "date: 11.01.08" and "issued to: Colleen & Nathan". I'll post the template in an upcoming entry...so stay tuned.
 Last but not least are the programs. I can't believe I'm about to say this, but our photographers only got ONE shot of our programs, and it was only of the back cover. The back cover featured the chorus of "You're My Best Friend" (courtesy of i heart peonies inspiration), which is great and all, but I labored over the eight-page, all-inclusive, programs that featured a vellum pouch on the last page with a single tissue tucked inside...for their tears of joy. I'm so incredibly disappointed that I don't have a photo of them, because the hotel threw away the extra copies, leaving us (and anyone who was in the processional) with no keepsake. Bummer, indeed.
photo credit: Essence Photo and Video
related posts: Vendor Review IV: Photobooth, Vendor Review III: Wedding & Reception Flowers, our budget-friendly wedding II: ceremony, Vendor Review II: Hair and Make up, our budget-friendly wedding I: Attire, The photos are in!!!, Vendor Review I: Reception Music
luminaries, luminaria, paper lanterns, whatever you may call them…
I love me some candles. Love, love, love them. Lord knows I’ve posted enough about candles and candlelight to drive that point home. But, I can’t help it; they are really beyond perfect. And, you’d be hard up to find something else that creates that kind of ambiance and drama on a budget.
With that said, I’d like to present another post on…wait for it…candles…
Luminaries aren’t only displayed on Christmas Eve anymore. Nope; wedding luminaries are a year-round phenomenon. They can be created from paper bags for a country wedding, punctured tin cans for an urban wedding, even ice for a winter wedding. They can be used indoors and outdoors alike, flanking a bride as she walks down a grassy aisle, lighting the way to the reception site, or dotting guest tables throughout the reception (like Martha's doily luminaries below). Paper bags are my personal favorite; that damn shabby chic gets me every time.
A simple google search reveals thousands of sites dedicated to precut, beatified paper bags. But, why get those when you can buy these paper bags (for next to nothing), which happen to be perfect for wedding luminaries and Martha Stewart’s hanging paper lanterns (last photo)!


 photo credit: Martha Stewart, Justin Marantz, Martha Stewart, Studio Foto via Style Me Pretty, Christian Oth Studio via Style Me Pretty, April Smith via Style Me Pretty
With that said, I’d like to present another post on…wait for it…candles…
Luminaries aren’t only displayed on Christmas Eve anymore. Nope; wedding luminaries are a year-round phenomenon. They can be created from paper bags for a country wedding, punctured tin cans for an urban wedding, even ice for a winter wedding. They can be used indoors and outdoors alike, flanking a bride as she walks down a grassy aisle, lighting the way to the reception site, or dotting guest tables throughout the reception (like Martha's doily luminaries below). Paper bags are my personal favorite; that damn shabby chic gets me every time.
A simple google search reveals thousands of sites dedicated to precut, beatified paper bags. But, why get those when you can buy these paper bags (for next to nothing), which happen to be perfect for wedding luminaries and Martha Stewart’s hanging paper lanterns (last photo)!


 photo credit: Martha Stewart, Justin Marantz, Martha Stewart, Studio Foto via Style Me Pretty, Christian Oth Studio via Style Me Pretty, April Smith via Style Me Pretty
DIY Wedding Signs
I’m so inspired by worn, wooden, handmade wedding signs. Whether it’s a (seemingly confusing) directional or a shabby chic ceremony sign...whether it’s nailed to a stake in the ground or hanging from a tree, wedding signs are, quite simply, the best DIY feature any wedding can have.
And, they don’t just make great photos (as we all know, I’m plagued with a love for a great photo op), they’re also functional! “Where’s the ladies room,” a guest may ask. “Why, it's right over there, next to the restroom sign,” she says to herself!
Take a look at some of the beauties that I’ve come across.
Oh, signage, how do I love thee?
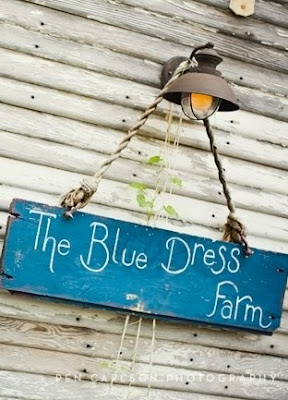


photo credits: Pen Carlson, Stacey Kane, Stephanie Williams, Leigh Miller, Southern Weddings
And, they don’t just make great photos (as we all know, I’m plagued with a love for a great photo op), they’re also functional! “Where’s the ladies room,” a guest may ask. “Why, it's right over there, next to the restroom sign,” she says to herself!
Take a look at some of the beauties that I’ve come across.
Oh, signage, how do I love thee?


photo credits: Pen Carlson, Stacey Kane, Stephanie Williams, Leigh Miller, Southern Weddings
calling all past and present Chicago brides
I need your help...
I would like very much to feature more excellent and budget-friendly vendors on my little wedding bloglette, but I've just scheduled the last of my vendors, and it appears that I'll run out of reviews by the end of next month!!! Eeek!
Herein lies my request. Do you have vendor recommendations that you'd be willing to share with me? If so, dish, women, dish! The future brides of Chicago need to know!
Here's what I would need from you:
your name
your website, if you have one
your wedding date
number of wedding guests
vendor name
vendor cost
vendor contact information
short description of your experience
all emailed to me at TheEverydayBride{at}gmail{dot}com...
*The term budget-friendly is a relative one. Therefore, please do not hesitate to submit your vendor, whatever the cost, as there will undoubtedly be many other brides who agree with your definition of budget-friendly. Can't wait to read about all of your vendors!!!
I would like very much to feature more excellent and budget-friendly vendors on my little wedding bloglette, but I've just scheduled the last of my vendors, and it appears that I'll run out of reviews by the end of next month!!! Eeek!
Herein lies my request. Do you have vendor recommendations that you'd be willing to share with me? If so, dish, women, dish! The future brides of Chicago need to know!
Here's what I would need from you:
your name
your website, if you have one
your wedding date
number of wedding guests
vendor name
vendor cost
vendor contact information
short description of your experience
all emailed to me at TheEverydayBride{at}gmail{dot}com...
*The term budget-friendly is a relative one. Therefore, please do not hesitate to submit your vendor, whatever the cost, as there will undoubtedly be many other brides who agree with your definition of budget-friendly. Can't wait to read about all of your vendors!!!
Chicago Wedding Venue: Farm
I suppose this post should be entitled, Chicagoland Wedding Venue VII, as this next venue is in Glenview, but I'm a fan of consistency, so the title shall remain...
I've been helping my oldest and dearest friend, Charlotte, find a venue for her August 2009 wedding (yes, yes, the date is creeping up on her, but this former Chicago bride, and guest blogger, once told me that all one actually needs is 6 months to really plan a wedding) and bless Charlotte's heart, all she has requested is that it be an affordable and outdoor venue. Wonderful! There should be plenty venues like that within 20 miles of Chicago, right? Well, not as many as I had imagined...
But, finally, after sifting through 85 golf courses and 10 junky farms, I think I have found a venue that may be perfect for her: Historic Wagner Farms! It's 50% rustic and 50% manicured and 100% adorable! And, what's more, it's seemingly affordable, with only a variety of nominal site fees ($500 site fee for Saturdays and only $350 for Fridays...and they have some really laid back (read: affordable) meal options!!!!). Almost too good to be true...hmmmm.... I'll be sure to keep you posted.


I've been helping my oldest and dearest friend, Charlotte, find a venue for her August 2009 wedding (yes, yes, the date is creeping up on her, but this former Chicago bride, and guest blogger, once told me that all one actually needs is 6 months to really plan a wedding) and bless Charlotte's heart, all she has requested is that it be an affordable and outdoor venue. Wonderful! There should be plenty venues like that within 20 miles of Chicago, right? Well, not as many as I had imagined...
But, finally, after sifting through 85 golf courses and 10 junky farms, I think I have found a venue that may be perfect for her: Historic Wagner Farms! It's 50% rustic and 50% manicured and 100% adorable! And, what's more, it's seemingly affordable, with only a variety of nominal site fees ($500 site fee for Saturdays and only $350 for Fridays...and they have some really laid back (read: affordable) meal options!!!!). Almost too good to be true...hmmmm.... I'll be sure to keep you posted.


Abandoned DIY Project I: DIY Mercury Glass Revisited
Thanks to Amanda over at the almighty VintageGlam citing my mercury glass project, I seem to have a number of new visitors here at my humble wedding-blog-abode. Thanks, Amanda! Naturally, I've received a number of Krylon Looking Glass inquiries as well. So, instead of continuing to reply one by one, I've decided to revisit my (ill-fated) DIY project in hopes to save the next DIY bride (or beginning-level crafter) from failure. Yes, I'll admit it: I failed. And yes, it's completely depressing. But, really, I'd rather see you succeed in DIYing your mercury glass, than to have failed in vain (a "craft and pass it on" of sorts)...
My first mistake: not enough time. I had a self-imposed deadline for all of my DIY projects so I wouldn't find myself awake at 3am - the morning of my wedding day, (you shake your head in disbelief, but I KNOW it's happened...). As a result, about a quarter of my projects were thrown overboard on various dates before our wedding, including my beloved mercury glass votives and cylinder vases (imagine all of these votives and pillar candles flickering in worn, seemingly-vintage, mercury glass, oh if only).
My second mistake: not enough stock. I ruined well over half of my cylinder vases and votives before I finally got the hang of it. Some of them came out badly streaked, while others looked like cloudy spray painted tin cans. It was bad... To safeguard against this, perhaps you could purchase some super cheap (like .39 votives) to practice on…
Here's the secret: short bursts. Spray one coat of Looking Glass very lightly and in short bursts on the inside of the cylinder vases or votives, while making sure to continuously turn the object while spraying, allow to dry, then repeat until you achieve the desired look. (Believe me when I say, you need a lot of time to complete this project - think of the drying time alone.) You might also want to speckle your cylinder vases with metallic leaf, or even shoot a few bursts of randomly sprayed gold-ish spray paint, before applying Looking Glass to create an even more worn effect. Below are a couple of crafty examples via Krylon.

 Alternatively, this look (below) might be achieved via Chef Fifi's approach: using silver, gold or copper leaf (see last photo for her DIY apothecary lid). You might be able to section off a lace pattern with this Etsy seller's lace tape, wrapping the tape on the inside of the cylinder vase and using the tape as a stencil. You would then use Looking Glass as instructed previously, but making sure to remove the tape before the paint dries completely. Then apply metallic leaf on the inside of the cylinder vase, making sure to leave some surface area uncovered, so to highlight the lace pattern. Worth a try, at least.


 Hope all of this information helps. Happy crafting!
Photo credits: Krylon, Krylon, Apartment Therapy, Brooker Pie, Chez Fifi
My first mistake: not enough time. I had a self-imposed deadline for all of my DIY projects so I wouldn't find myself awake at 3am - the morning of my wedding day, (you shake your head in disbelief, but I KNOW it's happened...). As a result, about a quarter of my projects were thrown overboard on various dates before our wedding, including my beloved mercury glass votives and cylinder vases (imagine all of these votives and pillar candles flickering in worn, seemingly-vintage, mercury glass, oh if only).
My second mistake: not enough stock. I ruined well over half of my cylinder vases and votives before I finally got the hang of it. Some of them came out badly streaked, while others looked like cloudy spray painted tin cans. It was bad... To safeguard against this, perhaps you could purchase some super cheap (like .39 votives) to practice on…
Here's the secret: short bursts. Spray one coat of Looking Glass very lightly and in short bursts on the inside of the cylinder vases or votives, while making sure to continuously turn the object while spraying, allow to dry, then repeat until you achieve the desired look. (Believe me when I say, you need a lot of time to complete this project - think of the drying time alone.) You might also want to speckle your cylinder vases with metallic leaf, or even shoot a few bursts of randomly sprayed gold-ish spray paint, before applying Looking Glass to create an even more worn effect. Below are a couple of crafty examples via Krylon.

 Alternatively, this look (below) might be achieved via Chef Fifi's approach: using silver, gold or copper leaf (see last photo for her DIY apothecary lid). You might be able to section off a lace pattern with this Etsy seller's lace tape, wrapping the tape on the inside of the cylinder vase and using the tape as a stencil. You would then use Looking Glass as instructed previously, but making sure to remove the tape before the paint dries completely. Then apply metallic leaf on the inside of the cylinder vase, making sure to leave some surface area uncovered, so to highlight the lace pattern. Worth a try, at least.
 Hope all of this information helps. Happy crafting!
Photo credits: Krylon, Krylon, Apartment Therapy, Brooker Pie, Chez Fifi
Subscribe to:
Posts (Atom)

 Posts
Posts


